How to Clean a Crystal Chandelier Without Damaging It

You've cleared the Dallas dining table for company, switched on the chandelier, and noticed a gray film where there should be sparkle. Before reaching for the window cleaner, look at what's holding those crystals up. The safest way to clean a crystal chandelier starts with its wiring, hooks, and access, not the spray bottle.
Table of Contents
Why a Crystal Chandelier Needs a Different Approach
A mirror stays still while you wipe it. A chandelier has suspended pieces, delicate connections, decorative finishes, and electrical components overhead. Treating the whole assembly as washable glass overlooks the parts most likely to suffer during cleaning.
Think of the job as preservation rather than polishing. Conservation guidance for historic interiors calls for inspecting pendants, protecting the area below, controlling moisture, and refusing to clean a fixture with unstable wiring. Those precautions apply just as sensibly to a family dining room as to a historic interior, as the guidelines for historic furnished interiors explain.
A brighter crystal isn't a successful result if its hook, finish, or electrical connection was damaged along the way.
Start with the fixture, not the dirt
An older chandelier may contain individually cut pieces and an arrangement that's difficult to reproduce. Crystal-chandelier production became established in Bohemia and Germany during the early eighteenth century, according to the historical account of chandelier development. You don't need to date your fixture precisely to recognize that an heirloom deserves a different approach from a modern, clearly documented model.
For broader context on caring for decorative glass, Professional Window Cleaning's professional art glass maintenance advice is a complementary resource, not a substitute for your chandelier manufacturer's instructions. Start with those instructions whenever they're available.
In Dallas, long air-conditioning seasons make overhead dust easy to overlook until the lights reveal it. Construction residue in a newer Plano or Frisco home presents a different cleaning challenge from light household dust. Neither situation automatically calls for disassembly or stronger chemicals.
If you're deciding how this fits into household upkeep, understanding deep cleaning versus regular cleaning helps separate routine dusting from a detailed condition check.
The Four Real Risks You Are Managing
The main failure modes aren't mysterious: misplaced liquid, incompatible chemicals, abrasion, and uncontrolled movement. The practical question is whether your chosen method controls all of them, rather than merely removing visible film.

Recognize the failure before it happens
- Liquid migration: A bead traveling toward a lamp holder is a reason to stop, not something to wipe away after finishing the tier. Installed fixtures shouldn't be soaked.
- Chemical attack: Ammonia, bleach, and undiluted vinegar don't belong in this workflow. Acidic or alkaline products can damage decorative finishes.
- Abrasion: Scrubbing with an abrasive pad can replace removable dirt with permanent surface damage. A stubborn mark needs reassessment, not more pressure.
- Uncontrolled movement: Pendants that collide, hooks that shift, or an arm that moves under light handling signal a mechanical problem.
These precautions align with the failure modes described in this crystal-chandelier cleaning guide. The important distinction is between cleaning a surface and stressing the assembly that supports it.
A properly cleaned prism should look clear under angled light. If cloudiness remains after gentle cleaning and drying, don't assume another stronger pass will fix it. Visible haze alone doesn't tell you whether you're seeing residue or existing surface damage.
Practical rule: When the surface stops responding to gentle cleaning, stop increasing the strength, wetness, or pressure.
There's also a material-identification problem. A clear pendant doesn't tell you how nearby plating, paint, or aging connectors will react. The Minnesota Historical Society housekeeping manual provides conservation context for material-specific cleaning rather than treating every component alike.
Preparing the Work Area and Yourself
Preparation happens on the floor. Switch the chandelier off at the wall, isolate its circuit at the breaker where practical, and let the bulbs cool completely. A wall switch controls normal operation; circuit isolation also guards against someone switching the light on while you work.
Move the dining table and chairs out of the access path. Place thick, absorbent padding beneath the fixture to protect the floor and cushion a dropped component, then keep children and pets outside the work area.

Make access and documentation deliberate
Use a stable stepladder that allows comfortable access without leaning, with another person stabilizing it as recommended in the conservation guidance discussed earlier. If the fixture requires scaffolding or reaching over a stairwell, arrange qualified help rather than improvising with furniture.
Before touching a pendant, prepare the following:
- Reference photographs: Capture each tier, attachment pattern, and any existing chip or missing piece.
- Separated supplies: Keep clean cloths, a soft brush, and the approved solution within comfortable reach.
- A condition record: Note loose hooks, discoloration, corrosion, and anything that moves unexpectedly.
Tall-ceiling fixtures in Highland Park or University Park deserve the same access assessment as any other installation. The neighborhood doesn't determine whether the job is manageable; the working height and fixture condition do.
For a separate overhead electrical appliance, DLG Electrical's Brisbane ceiling fan troubleshooting provides related reading. It isn't chandelier-specific guidance or a reason to investigate wiring yourself.
Don't copy the pictured fabric placement as a cleaning step. Protective padding belongs below the work, and fabric shouldn't pull against fragile suspended pieces.
Cleaning the Chandelier in Place
Leave sound crystals attached for routine dust and light film. Cleaning in place keeps the original arrangement intact and spares the hooks and hanging wires from handling they don't need. The trade-off is access: you're working around the fixture instead of at a basin, so every step has to stay controlled. Support, wipe, dry, next piece.
Start with a soft brush or lint-free microfiber cloth to lift loose dust, working from the upper sections downward. Conservation practice distinguishes fixed from freely moving components and requires individual support for each moving piece, so cup every pendant as you go to keep it from swinging into its neighbor. That one habit prevents most of the edge chips I see on otherwise clean fixtures.
In-Place Cleaning Supplies and Their Purpose
| Item | Purpose | Why It Matters |
|---|---|---|
| Soft, clean brush | Lift loose dust from details | Avoids forceful rubbing |
| Distilled water | Prepare a low-mineral cleaning solution | Reduces water spots |
| Approved pH-neutral, fragrance-free detergent | Address light surface film | Avoids unnecessary harsh ingredients |
| Lint-free microfiber cloths | Apply solution and dry separately | Keeps the wet and finishing stages distinct |
| Clean lint-free gloves | Handle polished prisms | Limits fingerprints |
Follow the crystal manufacturer's care instructions before mixing anything. Care guidance for major crystal brands, summarized in this crystal chandelier care and repair resource, favors mild pH-neutral detergent for washable pieces and warns against ammonia-based glass cleaners and abrasive materials. An ordinary window spray has no business on a high-end fixture.
Wipe without loading the hooks
Apply the approved solution to the cloth, then wring it nearly dry. Cup each prism gently and wipe from top to bottom, without tugging downward or lifting it off its hanging wire. A separate dry cloth follows immediately, before the film can dry back onto the surface.
Never spray the installed fixture directly. Keep the damp cloth away from wires, sockets, and connectors, and dry-dust the frame with the soft brush unless the fixture manufacturer specifies another method.
When you run out of comfortable reach, climb down and reposition the ladder. Rotating the chandelier shifts weight across every hook at once, and leaning sideways is how ladders tip. A piece that still resists this restrained approach is a decision point, not a challenge. Leave it for a material-specific assessment rather than escalating pressure, dwell time, or product strength.
For sensitive households, non-toxic, fragrance-free cleaning is a sensible product-selection principle. It still doesn't replace checking whether a product is compatible with the fixture.
When It Makes Sense to Remove Crystals
Heavy deposits can justify removing solid, clearly detachable prisms, but removal isn't automatically a better clean. You gain access to the crystal while accepting more handling, sorting, and reassembly risk.
Before holiday hosting in Lakewood or Uptown, it's tempting to take everything down at once. Resist that shortcut. If the manufacturer permits removal, photograph and label locations, then work on only a few pieces at a time.
Choosing the Right Cleaning Method for Your Fixture
| Fixture Situation | Recommended Approach | Reason |
|---|---|---|
| Light dust, secure pendants, comfortable access | Clean in place | Avoids unnecessary disassembly |
| Persistent film on documented, sturdy detachable prisms | Partial removal | Improves access while preserving order |
| Antique, painted, or wax-covered components | Seek conservation advice | Materials and deposits need individual assessment |
| Corroded hooks, loose wires, cracked crystal | Stop and refer | Cleaning won't correct structural damage |
| Access requires scaffolding or awkward reaching | Use a qualified specialist | Safe access needs separate planning |
Wash detached pieces as individual objects
Line a basin with a soft towel. Use lukewarm water and a small amount of manufacturer-approved mild detergent, gently clean each prism, rinse with distilled water, and dry immediately with a lint-free cloth.
A detachable-crystal care procedure supports padded-basin handling and small batches to prevent collisions and confusion. Although some household recipes include diluted vinegar, neutral detergent is the more conservative default when finishes or attachments are uncertain. There's no benefit in adding another ingredient without a clear need.
Removing a crystal should be an intentional access decision, not the first response to a stubborn spot.
Distilled water helps reduce mineral deposits during rinsing, as described in this chandelier-cleaning method. Dry each piece before returning it to its documented position.
If removal requires bending an old pin, forcing a connector, or holding an unstable arm, stop. A photograph can preserve the pattern, but it can't make a fragile attachment safe to manipulate.
Drying, Inspection, and Re-Energizing Safely
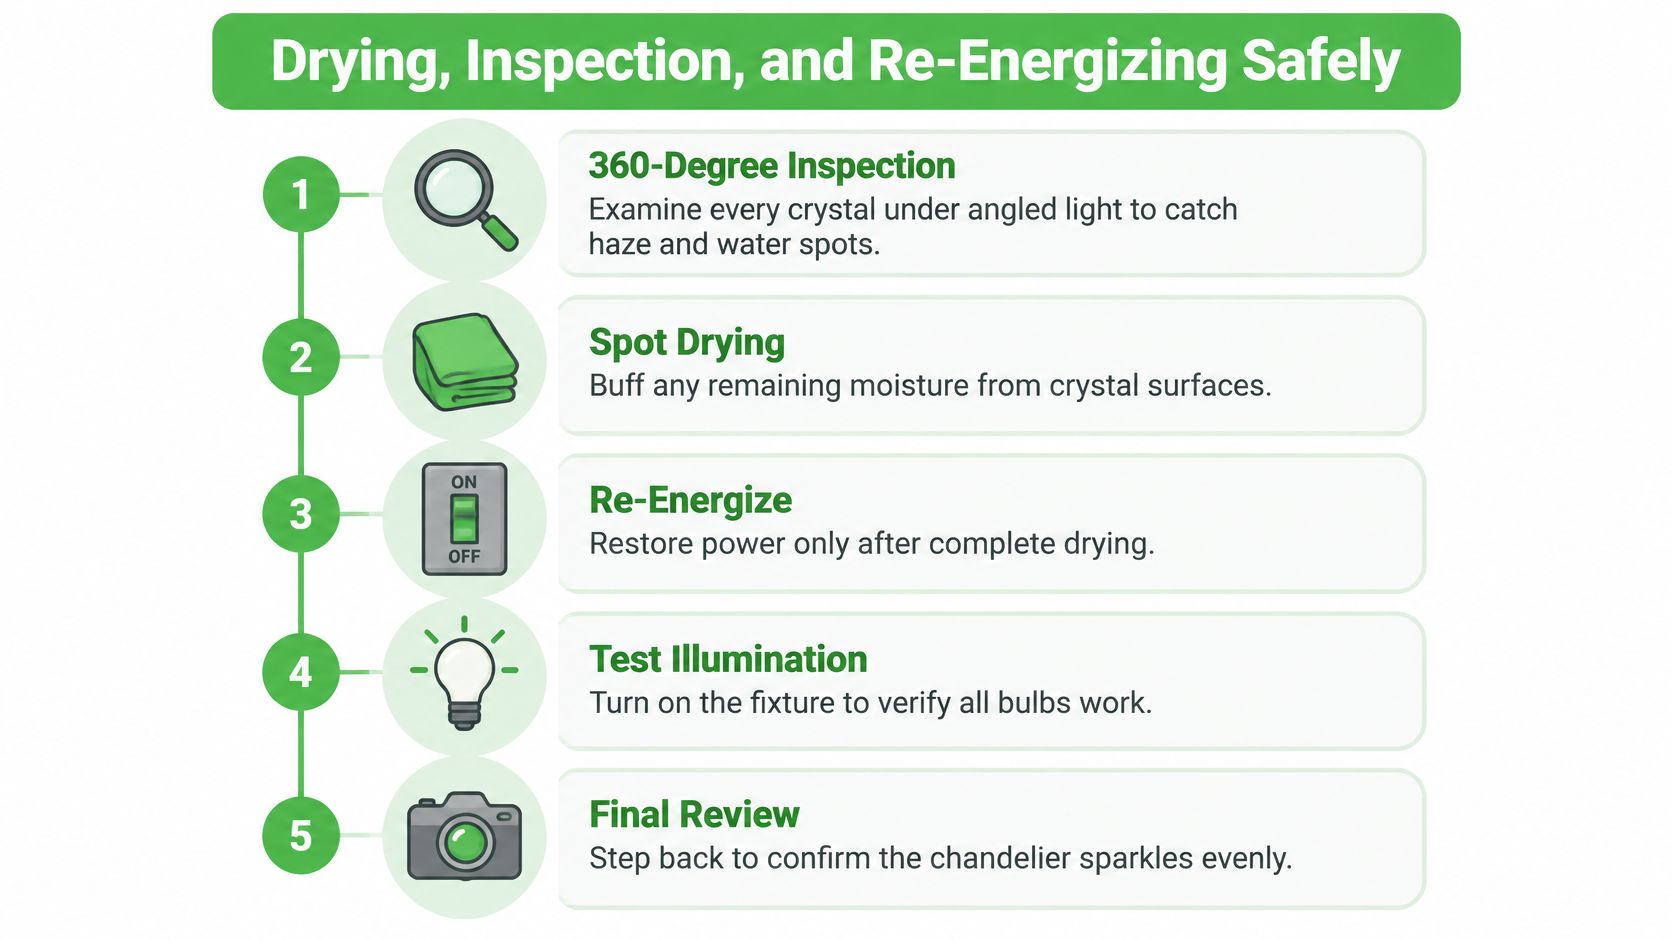
The job isn't finished when the cloth goes down. Inspection determines whether the fixture is ready for use. Examine the full chandelier under angled light, looking for haze, water marks, chipped edges, displaced pendants, and hooks that no longer match your reference photographs.
Verify dryness before restoring power
Polish remaining marks on the crystal with a dry cloth. Inspect accessible exterior surfaces around lamp holders and the canopy, but don't insert fingers, cloths, or tools into electrical contacts.
There's no universal drying countdown that proves hidden electrical components are dry. If liquid may have entered a socket, connector, or wiring enclosure, keep the circuit isolated and consult a qualified electrician. The conservation discussion on cleaning chandeliers provides relevant context for controlling moisture around these assemblies.
- Before switching on: Confirm the fixture is fully dry, correctly reassembled, and free of visibly displaced components.
- During the first illumination: Watch and listen from the floor for flickering, buzzing, or other abnormal operation.
- If something is wrong: Switch off, isolate the circuit, and seek electrical help if the breaker trips, you notice a hot smell, or operation has changed.
Forward Electrical's Forward Electrical safety inspection details offer related information about professional inspection. Don't repeatedly reset a breaker or try another cleaning pass to solve an electrical symptom.
Keep toddlers and pets away until you've removed the ladder, collected supplies, and confirmed that no loose components remain below the fixture. A clear floor matters just as much after the work as during it.
Keeping It Sparkling and When to Call for Help
Plan light dusting every one to three months and a detailed clean every six to twelve months, adjusting to visible conditions near cooking, smoking, or construction dust. Dallas households can use spring oak pollen, winter cedar pollen, long AC seasons, and holiday preparation as reminders to look upward. A reminder is not an instruction to wet-clean every time. If the prisms are clear and the attachments are sound, leave them alone.
Most chandelier damage I see comes from over-cleaning, not neglect.
Make maintenance smaller, not more aggressive
Add an overhead visual check to your daily house-cleaning routine, without making ladder work a daily task. Look for changing alignment, new discoloration, or a pendant that hangs differently. Changes caught from the floor are cheap to investigate; the same changes found after a crystal drops are not.
The decision points stay the same every visit:
- Keep DIY work modest: Accessible dusting and gentle wiping suit a sound, well-understood fixture.
- Use a conservator for material concerns: Antique finishes, unknown deposits, and fragile historic components need more than a household recipe.
- Use a lighting technician or electrician for defects: Corrosion, unstable arms, damaged attachments, and electrical symptoms are not cleaning problems.
Gmaids, a Dallas non-toxic, fragrance-free maid service since 2004, can handle accessible dusting and gentle wiping as part of recurring or deep cleaning. Discuss chandelier access and scope before booking, since specialist restoration and electrical repair remain separate work.
For help with household dust and accessible fixtures, Gmaids offers non-toxic, fragrance-free deep cleaning and recurring maid service across Dallas–Fort Worth, with chandelier scope assessed before work begins. Fragrance-free means synthetic scents are left out entirely, a practical fit for households managing allergies, asthma, or chemical sensitivities. Get an instant, flat-rate quote online at Gmaids, or call 214-997-6918 to discuss your fixture and cleaning needs.


Ready for a healthier, cleaner home?