Clean Laminate Countertops Safely: A Step-by-Step Guide
You're wiping toast crumbs off the counter for the second time this morning, your toddler is reaching for them, and the dog is watching from floor level where everything eventually lands. You want a counter that's actually clean, not just perfumed, and you don't want a harsh spray lingering where food, small hands, and paws spend their day. That's exactly where a gentler, label-reading approach to laminate pays off.
Table of Contents
- What That Construction Means for Cleaning
- The Three Steps That Clean Laminate Countertops Safely
- Adjusting for Dallas Conditions
Why Laminate Needs Gentler Care and the Three-Step Routine
A Dallas kitchen on a weekday morning tells the whole story. There's a coffee ring by the mug, cracker crumbs scattered where a toddler ate standing up, and a dog nosing hopefully along the counter edge. The surface looks tough enough to scrub hard. It isn't stone, though, and treating it like stone is how a good finish goes dull.
Most laminate countertops are high-pressure decorative laminate, a layered material rather than a single sheet of plastic. The top is decorative paper saturated with melamine resin, over multiple kraft paper layers impregnated with phenolic resin, bonded to a particleboard or fiberboard base. Those layers are consolidated at pressures exceeding 1,000 psi and temperatures approaching 300°F, as described in Arborite's laminate care and maintenance guidance. The result is a hard, sealed decorative face.
What That Construction Means for Cleaning
Think of the face as a finish to protect, not a slab to scour. It's generally nonporous and doesn't require sealing or refinishing, which is good news for daily upkeep. But the decorative layer sits on resin-impregnated paper and a wood-based substrate, so the assembly has two different needs at once. The top wants low abrasion, while the layers underneath want to stay dry.
Postformed countertops help a little here. The laminate is heated and rolled over the front edge during fabrication, which leaves fewer exposed seams where dirt and moisture can collect. If your counter has a rolled front edge, you've got one less joint to baby, but the sink area and backsplash line still need the careful routine below.
Protect the face with soft cloths, and protect everything under it by keeping water brief and controlled.
The Three Steps That Clean Laminate Countertops Safely
To clean laminate countertops well, you don't need stronger chemistry. You need the right order, a clean cloth for each job, and a dry finish every time.
Clear loose soil first. Sweep crumbs, grit, and dust off with a dry microfiber cloth before any liquid touches the surface. Dry particles dragged under a wet cloth act like fine grit across the finish. Getting them off first is what keeps a routine wipe from slowly scratching the surface you're trying to preserve.
Wipe with warm water and mild detergent. Add a few drops of mild liquid detergent to warm water and wipe with a clean, nonabrasive microfiber or cotton cloth, working in small sections. For stubborn organic residue, use gentle rotating or circular motions and give the detergent a moment to work. Warm water loosens everyday food soil and grease film without attacking the wear layer, so pressure stays light.
Rinse, then dry completely. Go back over the surface with a separate cloth dampened in plain clean water, wrung nearly dry, then dry the counter fully with a clean towel. Rinsing matters because detergent left behind dries into a film. Drying matters just as much, because a counter that looks rinsed but stays wet is where joints slowly take on moisture.
The most common slip is using the same cloth to wash and rinse. That cloth is already loaded with detergent and lifted soil, so the rinse pass just spreads a thin film back over the surface. The counter looks fine for an hour, then feels slightly tacky and starts attracting dust. Two cloths, one for each job, fix that in seconds.
Adjusting for Dallas Conditions
Frequency matters more here than intensity. During spring oak pollen and winter cedar pollen seasons, fine dust settles on horizontal surfaces faster than many households expect, so that first dry pass earns its keep. In the long summer air conditioning months, dust also builds up near entries and around appliances that rarely move. A quick daily three-step wipe keeps both from turning into a gritty film that needs scrubbing later.
Don't reach for abrasive powders, steel wool, or sharp tools when a spot resists, and don't cut directly on the surface. Prompt spill removal and low-abrasion technique preserve appearance far more reliably than a stronger product ever will. You're maintaining a sealed finish, and sealed finishes reward patience.
You'll know you're done when the surface shows no streaks, no tackiness, and a dry joint line. Run a clean fingertip across it. It should glide without dragging, and the area should smell like nothing at all, which is exactly what fragrance-free cleaning is supposed to leave behind.
Checking Seams and Edges Before You Clean
The decorative face is rarely where a laminate counter fails. It's hard, sealed, and forgiving of daily wiping. The trouble starts at the openings in that surface, where water can reach the particleboard or fiberboard underneath and swell it while the top still looks perfectly fine from above.
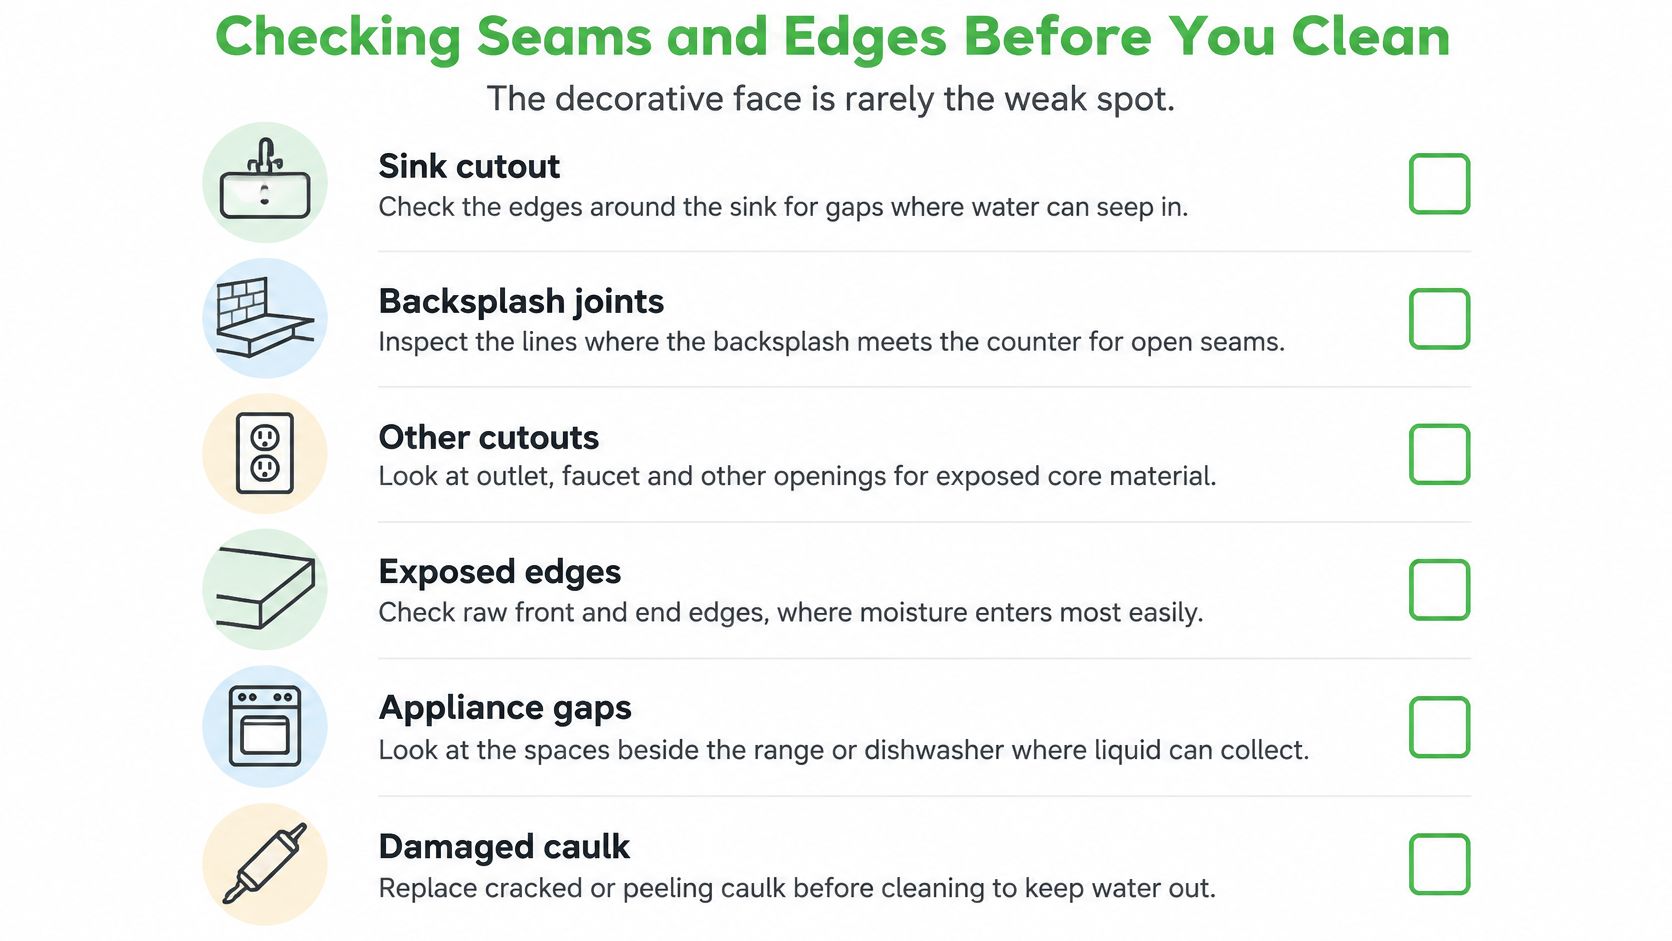
Where Water Actually Gets In
Work around these spots with a barely damp cloth, and dry along the joint line with a towel right after. Never let water sit at the sink rim while you finish the rest of the kitchen. The point isn't to keep these areas dirty to keep them dry. It's to clean them with minimal water and no puddles.
- Sink cutout. The rim where the sink meets the counter is the highest-risk area, since splashes land there daily.
- Backsplash joints. The line where counter meets backsplash collects water that runs down the wall surface.
- Other cutouts. Faucet holes and cooktop openings can expose core material if edges aren't sealed.
- Exposed edges. Raw front, side, or end edges absorb moisture faster than any other surface.
- Appliance gaps. Spaces beside the range or dishwasher trap liquid that nobody sees.
- Damaged caulk. Cracked or peeling caulk is an open door, no matter how careful your wiping is.
These are the localized failure points manufacturer instructions keep returning to, and Formica's care guidance on flooding and seam swelling makes the same point about water entering at seams. A nonporous top surface does not make the whole countertop assembly moisture-proof.
The Inspection Checklist and Stop Rule
Before any wet cleaning, look and feel for softened or lifting edges, raised seams, dark lines along joints, bubbling, a persistent odor from under the counter, and swollen or crumbling board visible from the cabinet below. Run a fingertip along each seam. It should feel flat and firm, not spongy, rough, or proud of the surrounding surface.
If you find those signs, stop cleaning that area beyond a light, barely damp wipe and dry. No cleaning process can reverse substrate swelling or delamination once moisture has done its work, and adding more water to a compromised joint only pushes the damage further. That's the point where repair or replacement becomes the honest conversation.
Homeowners ask about resealing laminate the way they'd reseal stone. Laminate faces generally don't get stone-style sealing, so there's no product to apply to the surface itself. What does need attention is deteriorated caulk at seams and around sinks, replaced before it fails. Renters and landlords should document seam and edge condition with photos at move-in and move-out, which protects both sides from disputes about damage that was already underway.
Stain-by-Stain Fixes That Stay Gentle on the Surface
Start every stain with the mildest option, give it time to work, and test any new method on a hidden spot first, like the underside of a cutout or a low corner near the backsplash. If a mark is still visible after two gentle passes, the answer is patience and a second round of warm detergent, not an escalation to stronger chemistry.
| Stain or Residue | Gentle First Try | Avoid | Stop and Get Help If |
|---|---|---|---|
| Coffee, tea or juice | Warm water and mild liquid detergent, wiped promptly, then rinsed and dried | Bleach, ammonia, abrasive powders | Mark remains after two gentle passes |
| Cooking oil or grease film | Warm detergent on a soft cloth in small circles, then a clean-water rinse | Steel wool, scouring pads, solvents | Residue stays tacky after rinsing and drying |
| Dried food or sticky residue | Soften with a damp cloth for about a minute, then wipe with detergent | Scrapers, razor blades, sharp tools | Surface is gouged or the finish is lifting |
| Mineral spots and soap film | Warm water and mild detergent, full rinse, then dry thoroughly | Acidic cleaners of any kind, abrasive scrubs | Film returns after the surface is fully dry |
| Ink or marker | Gentle detergent on a soft cloth with light dabbing | Acetone, nail polish remover, other solvents | Ink has soaked into a seam or edge |
| Water pooled at a seam or edge | Blot immediately, then dry the joint thoroughly | Flooding the area with cleaner or water | Edge is soft, raised or swelling |
| Heat mark or cloudy patch | Stop scrubbing and clean gently around it | Abrasives, hot pans set on the surface | Discoloration, bubbling or a lifted edge |
The avoid column follows one logic. Products that are hard on the finish tend to be hard on the household too, leaving fumes in a closed kitchen and residue on a surface where kids lean, pets investigate, and food gets set down without thinking. Wilsonart's high-pressure laminate care guidance warns that acidic or abrasive cleaners and excessive scrubbing can permanently damage laminate, and that damage is cumulative. Each harsh pass thins the wear layer a little, until stains that once wiped off start to stay.
Fragranced products add a different problem. Synthetic fragrance can mask residue rather than remove it, so a counter can smell clean while a grease film is still sitting on it. Fragrance-free, plant-derived and mineral-based products tell you the truth by feel. If fingertips glide and nothing smells like a scent aisle, the surface is clean on its own merits.
Mineral spots from hard water deserve a word, because they tempt people toward acidic cleaners. On laminate, the safer move is warm detergent, a thorough rinse, and complete drying, repeated if needed. Solvent-based removers for ink belong in the same category. They can attack the finish faster than they lift the mark, and dabbing gently with detergent handles fresh ink more often than people expect.
Some marks won't budge, and that's information, not failure. A stain that survives two careful rounds may be in the finish rather than on it. That's when a professional assessment beats more scrubbing, because the next step up in force is usually the step that leaves a permanent dull patch.
Disinfecting Without Harming Seams or the Finish
Stronger chemistry is not automatically more hygienic. A counter can look spotless and still not be disinfected, and a counter doused in a harsh product can end up damaged without ever being properly disinfected either. Cleaning and disinfecting are two separate steps, and confusing them is where most home routines fall short.
The deciding factor is labeled contact time, not how much product you spray. A disinfectant only works for the period its label specifies, and the surface has to stay visibly wet for that entire period. Spraying and immediately wiping dry gives you a damp counter and a false sense of security.
The Low-Exposure Protocol
- Remove visible soil first. Wash with detergent and water, then rinse. Disinfecting over grease or food residue undermines the product before it starts.
- Choose a labeled product. Pick an EPA-registered disinfectant whose label allows use on laminate, checking the EPA list of selected registered disinfectants if you're unsure what qualifies.
- Apply for full wet coverage. Wet the surface completely, keeping liquid controlled near seams and edges rather than flooding them.
- Start a timer. Keep the surface visibly wet for the full contact time, reapplying if it starts to dry early.
- Air-dry or rinse as directed. Let it air-dry unless the label requires a rinse, and follow food-contact rinse instructions before food touches the surface.
Why such caution about product choice? Manufacturers don't all agree. Some prohibit acids, alkalis, and sodium hypochlorite outright, while others allow certain products under specific conditions. That means the countertop manufacturer's care sheet and the product label together make the call for your specific brand and finish, and generic advice can't override either one. This is also why homemade or pantry mixtures aren't recommended for disinfecting. Their strength and effective contact time can't be verified, so you're guessing at the one step where guessing defeats the purpose.
A disinfectant that dries too fast or gets wiped off early hasn't disinfected anything, no matter how strong it smelled.
The common failures are predictable. Too short a contact time, disinfecting over greasy soil, leaving chemical residue behind, and letting liquid pool at seams account for most disappointing results. Each one is a technique problem, not a product problem, which is reassuring. You can fix all four without buying anything stronger.
If you'd rather hand this step off, Gmaids' sanitizing cleaning takes a fragrance-free, plant-derived approach focused on high-touch areas, with the same clean-first discipline. Our overview of how to choose disinfectant cleaning products safely walks through label reading in more detail for households with kids, pets, or chemical sensitivities.
Daily Habits and Product Warnings That Protect Laminate
Heat is the habit that matters most, because laminate is heat-resistant within limits, not immune to heat. The surface may look fine while the contact adhesive underneath is losing grip. That is why a counter can fail at an edge or seam months after the pan that caused it.
The Trivet Rule and the Numbers Behind It
Set every hot pan on a trivet or the stove. Boiling water is no exemption: water near 212°F is already in the range where adhesive softening is a concern, so blot spills fast and never park the pot on laminate while you grab a lid.
| Working heat ladder | Risk pattern | Countertop rule |
|---|---|---|
| About 140°F (60°C) and up | Prolonged contact can start surface and bond stress | Keep heated items off laminate |
| Around 150°F, repeated | Warmth in the same spot can age laminate and adhesive over time | Move heat-producing appliances off the counter edge |
| Around 200°F | Adhesive-softening territory begins; boiling water sits above this | Use an insulated pad and wipe spills immediately |
| Above about 250°F | Hot utensils left for extended periods raise failure risk | Return cookware to the stove or a trivet |
| Around 285°F, maintained | Discoloration and bond damage become likely | Treat all cookware as over the limit |
Use this as a conservative field guide, not a brand specification. For product-line guidance, check Wilsonart's laminate Q&A and your own manufacturer's care sheet before trusting a threshold. During holiday hosting in Dallas, Plano, or Frisco kitchens, crowded counters make trivets more important, not less.
What Stays Out of the Cabinet
- Bleach and ammonia. Harsh fumes, extra residue, and finish risk with repeat use.
- Acidic cleaners. They can attack the surface; mineral spots are better handled with the gentle method already covered.
- Drain-cleaner lye and rust removers. Concentrated caustics can damage laminate on contact and need immediate removal if spilled.
- Steel wool and abrasive powders. They scratch the wear layer and leave texture that grabs the next stain.
- Synthetic-fragrance sprays. Scent can hide residue, so the surface feels finished before it is clean.
Keep the rhythm simple. Wipe spills right away, run the three-step routine daily, deep-clean weekly, and check seams monthly using the inspection points from earlier. If counters are one piece of a larger reset, a daily house cleaning list keeps the cadence manageable without turning counter care into a project.
When to Stop DIY and Book a Green Clean
Two gentle rounds is my hard limit. If a stain on laminate survives both, scrubbing harder just grinds grit into the wear layer or pushes moisture toward the seam. At that point the job calls for better equipment, a trained hand, or someone who has seen that stain before.
Bring in help when the work outgrows a cloth and a few patient minutes:
- A stain survives two gentle rounds and the urge to reach for an abrasive pad is getting loud.
- A move-out or seasonal deep clean puts the oven, fridge, cabinet interiors, and drawers on the same list as the counters.
- Post-renovation dust has settled on every horizontal surface, including the fine grit that scratches laminate if it gets wiped dry.
Gmaids teams clean with fragrance-free, plant-derived and mineral-based products, with no bleach, ammonia, or synthetic fragrance, so the product rules from earlier in this guide stay intact. For laminate specifically, deep cleaning covers the appliances and cabinet work around the counters, move-in/move-out cleaning resets the whole kitchen at once, post-construction cleaning gets that gritty dust off safely, and recurring maid service keeps the daily routine from slipping. The full list is on our page for green cleaning and non-toxic maid service in Dallas.
One concrete next step: when you book, mention the laminate and flag any open seams so the crew arrives with the right products and a light touch around the edges.
Your laminate counters deserve a clean that protects the finish, the seams, and the people and pets who live around them, and that is exactly how Gmaids has cared for Dallas-Fort Worth homes since 2004. Healthy Homes, Families and Souls. We green clean without toxic chemicals. Visit Gmaids for an instant, flat-rate quote or call 214-997-6918, and let a fragrance-free clean handle your kitchen the gentle way.


Ready for a healthier, cleaner home?