How to Get Rid of Mildew in Shower Without Harsh Chemicals
You cleaned the shower, rinsed away the suds, and put the bath toys back. Now the dark dots are back along the caulk, and you're wondering whether you need a stronger spray or just a better brush.
To get rid of mildew in shower corners and keep it from returning, judge your cleanup by what happens after the surface dries, not just how bright it looks immediately. In a Dallas household with kids, pets, and a busy morning routine, the practical approach is simple: identify the buildup, clean with a suitable fragrance-free product, and find out why that spot stays wet.
Table of Contents
Check What Kind of Mildew You Have First
The most common mistake is treating every dark mark as mildew. Color alone won't identify a mold species, and a stain doesn't prove that growth remains active. Look at the texture, the material underneath, and whether the mark changes after cleaning and drying.
Shower marks, likely causes and first moves
| What you see | Likely cause | First move |
|---|---|---|
| Pink or orange slime in tray and corners | Bacteria in wet soap residue | Scrub with soap and water, then dry fully |
| Black or green specks in grout or silicone caulk | Mildew rooted in porous material | Scrub first, replace caulk if spots remain |
| Gray or white film on tile and glass | Soap scum and hard-water minerals | Use a mild, fragrance-free cleaner and rinse well |
| Musty smell or spots that return within days | Hidden leak or trapped humidity | Check plumbing and the fan before cleaning again |
| Growth on the ceiling above the shower | Condensation and weak ventilation | Run the fan longer and confirm it vents outdoors |
Pink slime usually needs physical removal, not a mold-specific chemical. Pale film needs a cleaner suited to deposits and the shower's finish. Dark specks deserve closer inspection, especially where caulk has separated or grout has developed holes.
Check the conditions around the stain
Walk through the bathroom after bathing. Does the fan run during and afterward? Does the room stay damp for hours? Do certain grout lines remain dark while surrounding tile dries?
The U.S. Environmental Protection Agency explains that eliminating every indoor mold spore isn't practical, so moisture control is essential; it recommends drying wet materials within 24–48 hours. That's a prevention benchmark, not permission to leave shower puddles until tomorrow.
Dallas's long air-conditioning season doesn't remove the need for bathroom exhaust. A comfortable bedroom can sit beside a damp shower enclosure.
Practical rule: A mark that keeps returning deserves a moisture check before another cleaning product.
Safe, Fragrance-Free Cleaners and Tools That Work
Fragrance-free soap and warm water are the default, not the fallback. They let you loosen surface buildup and physically remove it without automatically adding a disinfectant. Apply the solution with a cloth or brush rather than filling a small bathroom with spray mist.
Fragrance-free means synthetic scents are left out entirely. It isn't interchangeable with unscented, which doesn't necessarily tell you whether masking fragrance is present. Our guide to fragrance-free cleaning explains why that distinction matters to sensitive households.
Cleaning options compared for shower mildew
| Option | Best for | Never combine with |
|---|---|---|
| Fragrance-free liquid dish soap in warm water | Light surface mildew on tile, glass and fiberglass | Bleach, ammonia or any scented cleaner |
| Baking soda paste, three parts soda to one part water | Grout lines and textured surfaces | Vinegar in the same step |
| White vinegar diluted equally with water | Soap scum and mineral film on compatible sealed tile | Bleach or any other product in the same bottle |
| Hydrogen peroxide labeled 3% | Stubborn grout spots after scrubbing | Vinegar, in the same container or step |
These are separate options, not a cleaning cocktail. Rinse thoroughly before changing products, and don't combine leftovers in a spray bottle.
Match the cleaner to the finish
Baking soda adds gentle abrasion, but a paste can still dull a delicate finish. Vinegar helps with mineral deposits, not every shower stain, and sealing doesn't make marble, limestone, or other acid-sensitive stone suitable for it. Use vinegar only where the surface manufacturer permits acidic cleaners.
Peroxide is an optional spot treatment, not proof that embedded growth has been removed. Check compatibility with colored grout, metals, and surrounding finishes, then test somewhere inconspicuous.
The EPA's bleach guidance says chlorine bleach and other biocides aren't recommended for routine mold cleanup. It also warns that combining chlorine bleach with ammonia-containing cleaners can produce toxic fumes.
Gather a nylon grout brush, soft non-scratch pad, microfiber towels, squeegee, gloves, and eye protection. Keep the shower brush separate from sink-cleaning tools, and wash and dry it afterward. Store every product out of children's and pets' reach, including products described as natural.
How to Clean Shower Mildew Step by Step
Start with intact, washable shower surfaces. If tile is loose, the wall feels soft, or water appears outside the enclosure, stop and investigate the damage rather than soaking the area again.
The EPA's mold-cleanup guidance supports detergent-and-water scrubbing followed by complete drying on hard surfaces. It says occupants can generally handle areas smaller than approximately 10 square feet following its guidance; larger or repeatedly returning contamination deserves professional assessment.
Clean in an order that avoids rework
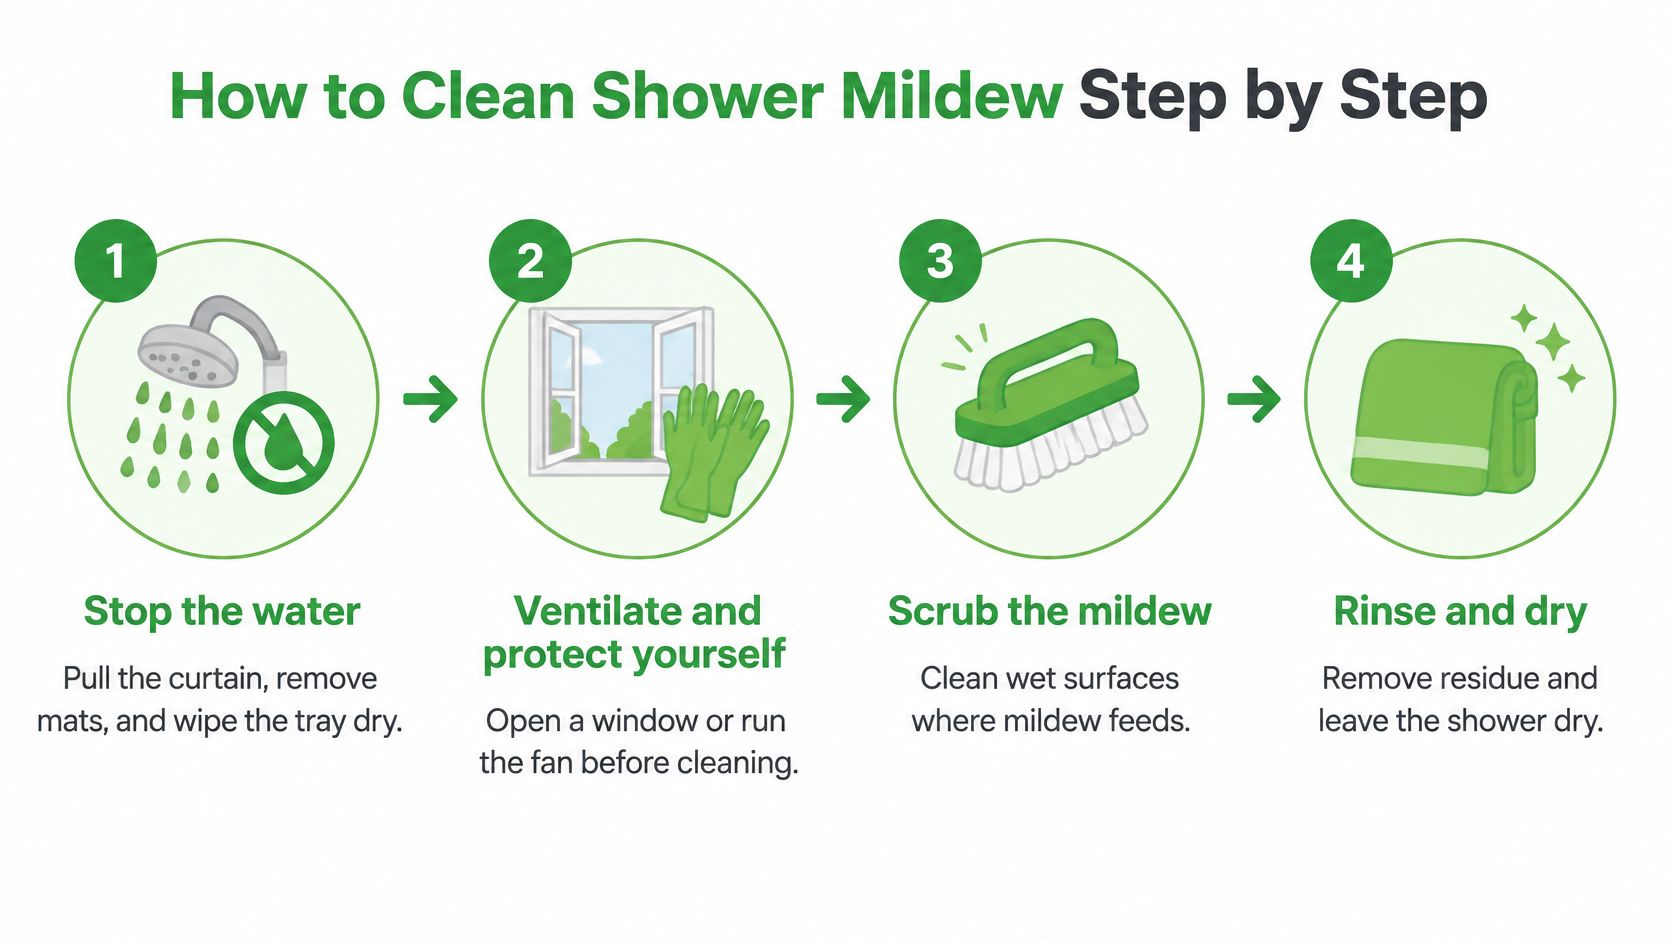
Stop the water and clear the enclosure. Turn off the shower, remove bottles, toys, and mats, and move the curtain aside. Wipe up standing water so you can see the corners and avoid diluting your cleaning solution immediately.
Ventilate and protect yourself. Run the exhaust fan or open a suitable window before cleaning, then put on gloves and eye protection. Keep children and pets outside the work area so they aren't touching cleaner or walking over slippery surfaces.
Lightly wet the surface. Use warm water to dampen washable tile, glass, or fiberglass. Don't flood cracked joints or spray water into openings around fixtures.
Apply the soap solution from top to bottom. Use a cloth or soft brush to distribute it, allowing a short dwell while the surface remains wet. Give the detergent time to loosen buildup, but don't let it dry into another film.
Scrub with controlled pressure. Work grout lines with short nylon-brush strokes and use the softer pad on broad surfaces. Where appropriate, try baking soda paste on stubborn textured areas rather than increasing pressure until you damage the finish.
Rinse away the loosened material. Use clean water until the surface no longer feels soapy. Pay attention to ledges and channels, where dirty rinse water collects; these techniques for cleaning shower door tracks help with those narrow spaces.
Dry the enclosure completely. Squeegee glass and smooth walls, then towel the tray, corners, and accessible joints. Leave ventilation running until residual dampness clears, rather than treating a timer alone as proof that the job is finished.
Check the result before adding anything stronger
Inspect the clean, dry grout under good light. If careful cleaning leaves persistent dark marks inside caulk, don't keep abrading the surrounding tile to chase them.
Remove a washable curtain liner and clean it according to its care label with fragrance-free detergent. Rinse it thoroughly and spread it out to dry, rather than bunching wet folds together. Keep the bathroom off-limits to little hands and paws until cleaner has been removed and walking surfaces are dry.
Fixing Grout and Caulk That Keep Growing Back
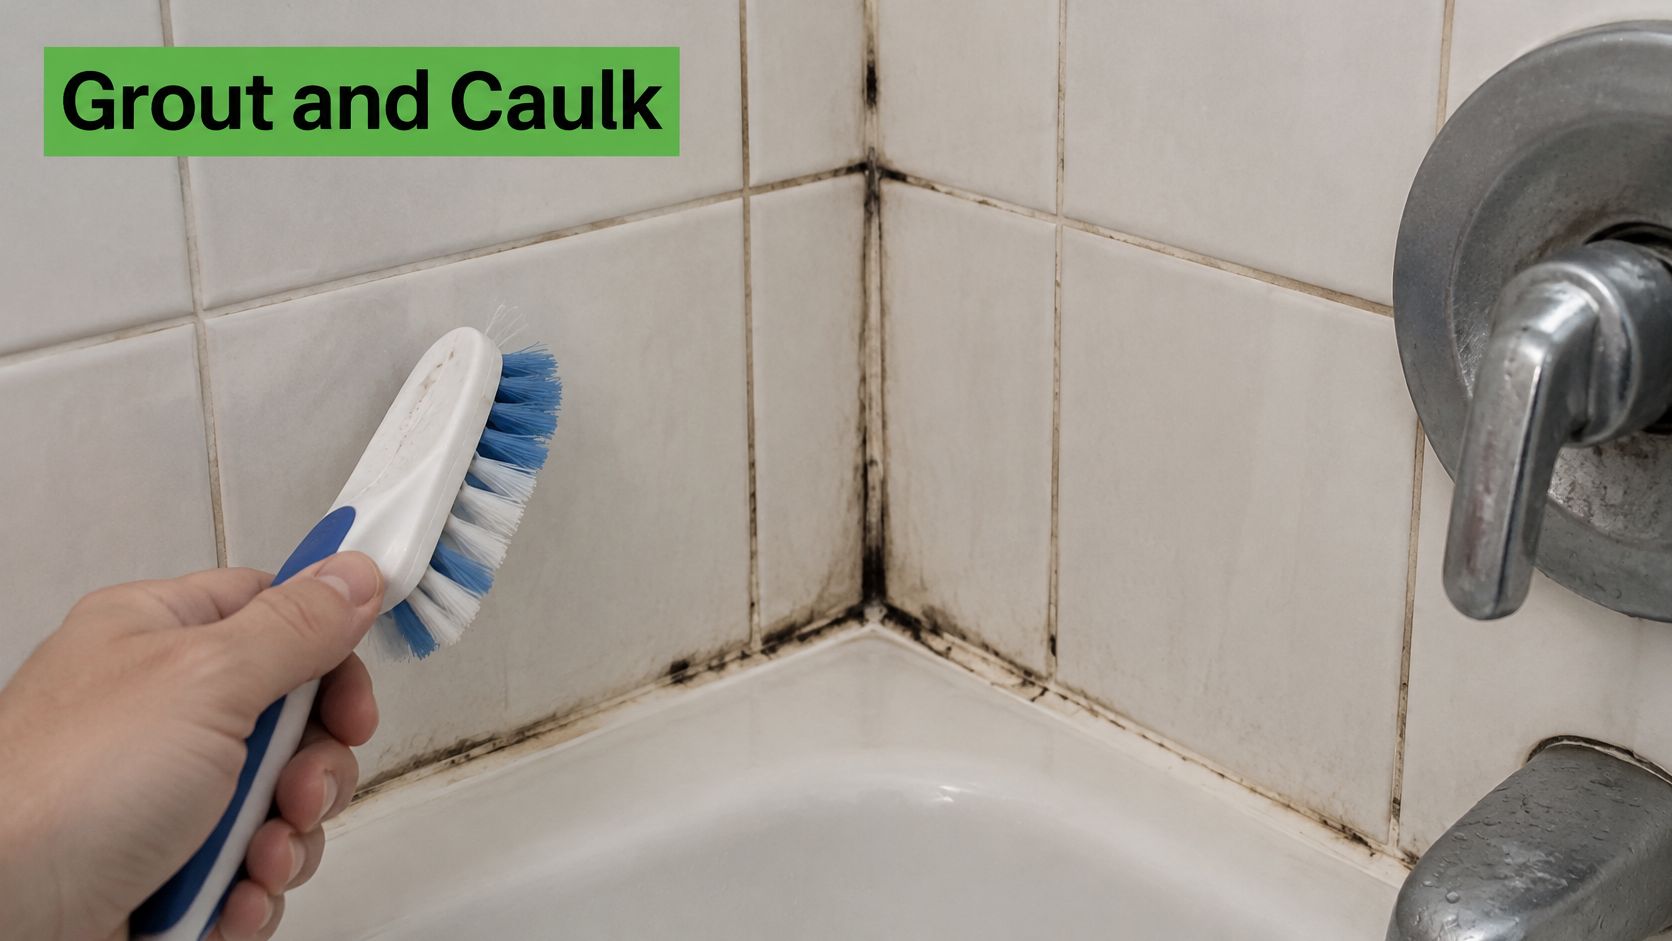
A joint needs repair when caulk lifts at the edge, grout crumbles, or an opening holds water. A dark mark alone isn't enough to diagnose failure, but discoloration combined with a loose or persistently wet joint makes repeated surface cleaning a poor investment.
The EPA's mold and moisture guidance explains that growth can penetrate porous materials and may be difficult or impossible to remove completely. Material that can't be cleaned and dried may need replacement.
Repair the cause before sealing the joint
Start by documenting the location and checking nearby plumbing, tile, and exhaust. Renters should send photographs of gaps, recurring dampness, or suspected leaks to property management before removing building materials.
For a small, accessible failed caulk bead, use a plastic scraper or suitable caulk-removal tool carefully. Avoid cutting into the waterproofing behind the joint. Keep debris contained and the room ventilated, and stop if removal exposes soft backing, extensive growth, or unexplained moisture.
- Clean adjacent surfaces. Remove residue from intact hard surfaces with detergent and water.
- Let the joint dry fully. Don't hide a damp cavity beneath fresh silicone.
- Use the appropriate sealant. Choose bathroom-rated silicone compatible with the surfaces, tool the bead, and follow its curing instructions before showering.
- Repair grout selectively. Replace unsound grout rather than coating over loose material, and seal only where the grout manufacturer recommends it.
New caulk is a water-management repair, not a cover-up for a wet joint.
Modern Bathrooms' explanation of why bleach cannot prevent sealant mould is useful context when you're deciding between another stain treatment and replacing compromised sealant.
Inspect changes of plane, including wall corners and the tray edge, particularly carefully. Those joints need the correct flexible treatment, not an improvised patch of rigid grout. Even in a newer Plano home, fresh-looking tile doesn't tell you whether every joint is intact.
Ventilation and Routines That Stop Regrowth
The exhaust fan deserves more attention than the spray bottle. Cleaning removes buildup from the surface; exhaust removes moisture-laden air from the room. If that air stays trapped, you'll keep doing the same cleanup.
An Alaska Housing Finance Corporation building manual citing ASHRAE recommends approximately 50 cubic feet per minute for intermittent bathroom exhaust or 20 cubic feet per minute continuously, with the fan as close to the shower as possible. Installation directly over the shower requires a fan rated for that location.
Make the fan useful, not merely audible
A running motor doesn't prove that air reaches outdoors. Have an HVAC or ventilation professional check an uncertain duct route, weak extraction, or a discharge into the attic. Clean the accessible fan cover according to its instructions, with power off, rather than pushing dust into the housing.
That applies to established Dallas bathrooms and new-construction homes in Frisco alike. Don't assume a new fan is correctly positioned or that a quiet one isn't working.
Build a short routine around the last shower of the morning:
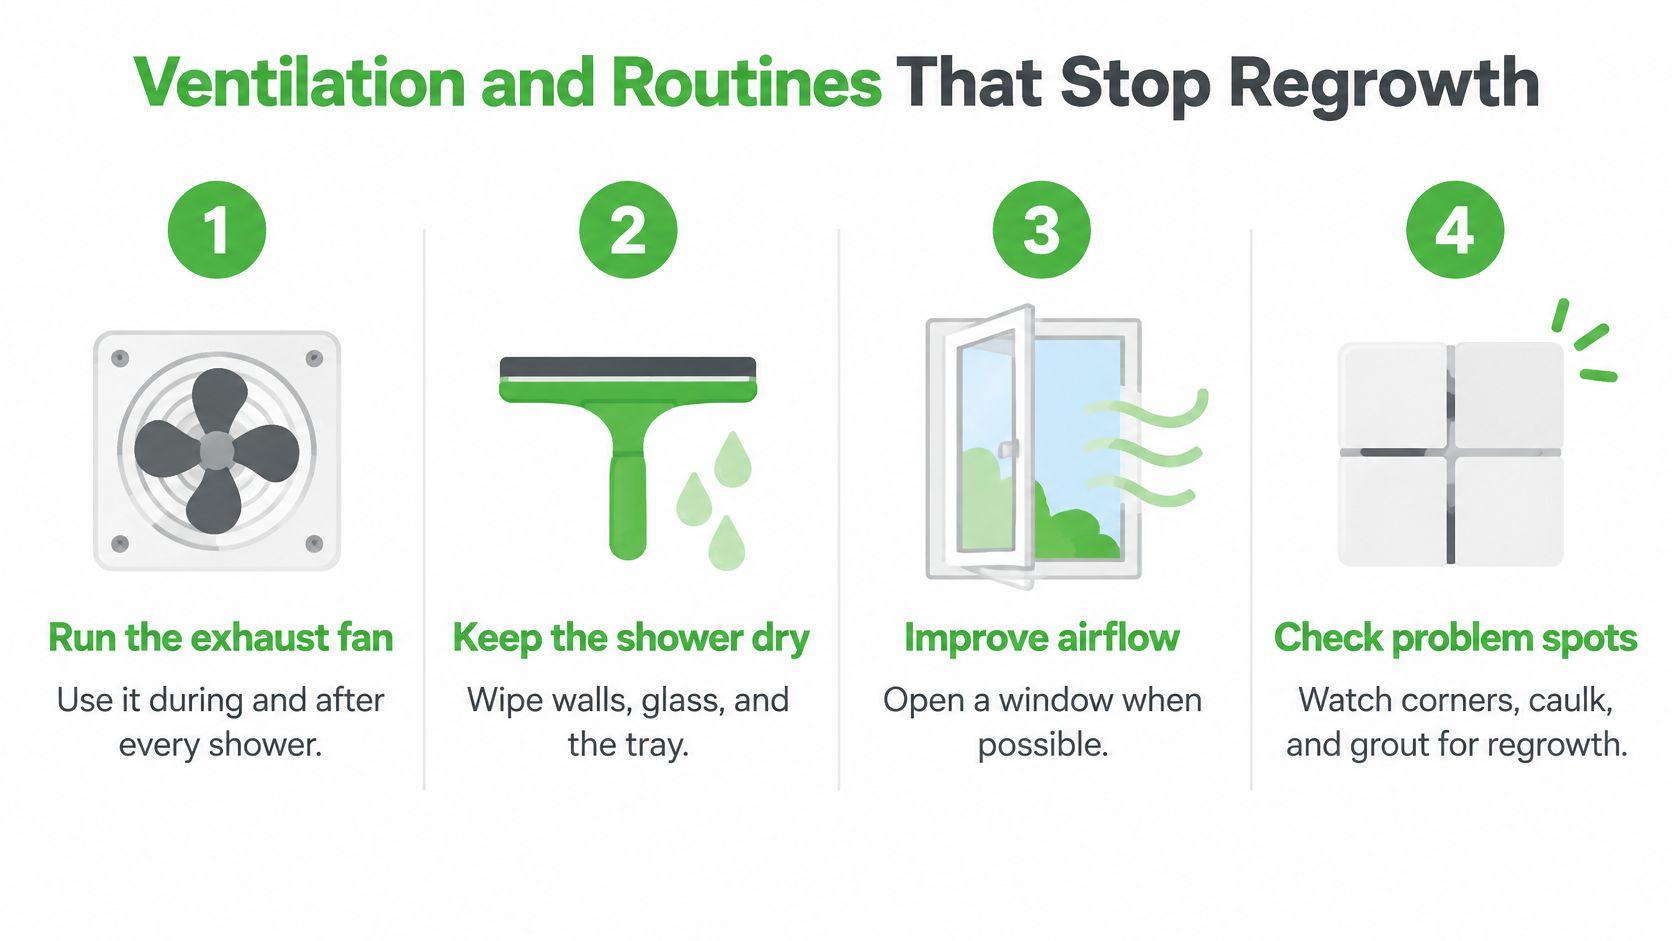
- Run exhaust during and afterward. Keep it operating until lingering bathroom moisture clears.
- Remove water from surfaces. Squeegee the glass and walls, and wipe puddles from the tray.
- Spread the curtain out. Leave it extended so the folds dry, rather than gathering it at the end of the rod.
- Keep corners accessible. Move bottles off wet ledges and wash soap residue from underneath them.
- Watch the pattern. Note whether the same joint stays damp while everything around it dries.
For another maintenance checklist, Restore Heroes' guide to keep shower grout free of mold offers useful bathroom-prevention context.
A dehumidifier can supplement ventilation when the room remains humid, but it won't repair a leaking joint or disconnected exhaust duct. Persistent mirror fog, wet walls, and recurring corner spots are reasons to investigate airflow rather than extend your cleaning session.
Decide Between DIY Cleaning and a Professional Visit
Choose DIY when the affected patch is limited, the surface is intact and washable, and you can clean and dry it safely. The CDC's mold guidance supports soap-and-water cleaning on hard surfaces followed by thorough drying, while noting that porous or water-damaged materials can be harder to clean completely.
The deciding question is whether the moisture source is fixed. Scrubbing a stain off sound grout is a reasonable afternoon job. Scrubbing the same joint for the third month in a row means the damp conditions behind it are still feeding regrowth, and no cleaning visit solves that on its own.
Professional help should match the problem. A cleaner removes routine buildup; a licensed plumber repairs a plumbing leak; a remediation specialist assesses extensive or concealed contamination. Eagle Restoration's overview of safe cleanup for minor mildew provides additional context for that distinction.
Choose the right kind of visit
- Routine buildup and limited surface marks. Cleaning may be appropriate when the finish and surrounding joints are sound.
- Returning spots despite careful maintenance. Investigate ventilation, caulk, and plumbing rather than repeatedly booking stain removal.
- Musty walls, soft material, or water damage. Arrange assessment before ordinary housekeeping.
- An evident mold biohazard. Gmaids won't service the home under those conditions; routine cleaning isn't remediation.
Gmaids has provided non-toxic, green house cleaning in Dallas since 2004, serving Dallas and surrounding communities with Certified Cleaning Teams® who are trained, background-checked, and insured.
For an appropriate cleaning visit, our residential deep cleaning guide explains the difference between routine upkeep and a more thorough reset. We use non-toxic, fragrance-free products with no bleach, ammonia, or synthetic fragrance; tubs, sinks, showers, and cooktops are scrubbed with Bon Ami Powder Cleanser, a fragrance-free, dye-free mineral scrubber with no chlorine. One practical detail: our technicians don't carry toilet brushes, so keep one in each bathroom for the team to use.
That product approach suits households with kids, pets, or anyone managing allergies or chemical sensitivities, without promising a medical outcome.
Gmaids offers deep cleaning and weekly, biweekly, or monthly recurring maid service to help keep suitable shower surfaces free of buildup once leaks and ventilation problems are addressed. Get an instant, flat-rate quote online at Gmaids or call 214-997-6918, and mention the shower's condition and how long the mildew has been returning so we can help you choose an appropriate visit.


Ready for a healthier, cleaner home?