How Do You Clean Textured Ceilings Safely

You look up while getting the living room ready for guests and notice cobwebs in the corner, gray dust around the ceiling fan, and a mark you hadn't seen before. A quick wipe sounds easy, until you wonder whether those little bumps will come off with the dirt.
So, how do you clean textured ceilings without damaging them? First, decide whether the ceiling should be touched at all. Once the material is cleared for cleaning, start dry, use almost no pressure, and reserve moisture for small, tested spots. In Dallas homes, that distinction matters more than choosing a stronger spray.
Table of Contents
Check Whether Your Ceiling Is Safe to Clean
If you don't know when the ceiling texture was installed, don't start by testing a duster on it. A ceiling's appearance can't tell you whether it contains asbestos, and the building's construction date doesn't settle the question either. Remodeling can introduce different materials, while older product stock may have been used after manufacturing restrictions changed.
Before moving furniture or unpacking tools, look up from floor level. Check for staining, cracks, peeling, sagging, and loose particles on furniture or floors. Don't pinch a bump, scrape a corner, or collect a sample yourself.
The U.S. Environmental Protection Agency's homeowner asbestos guidance warns that damaged or disturbed asbestos-containing materials can release fibers, and says homeowners shouldn't dust, sweep, or vacuum debris that may contain asbestos. Scraping, sanding, drilling, and stiff brushing can turn a housekeeping task into a hazardous-material problem.
Match the ceiling to the next step
Ceiling situations and the safe next step
| Ceiling situation | What to do |
|---|---|
| Built 1945-1978, or construction date unknown | Stop and arrange accredited asbestos sampling before any cleaning. EPA materials identify this construction and remodeling period as a concern, but explain why age alone cannot establish that material is asbestos-free. |
| Damaged, crumbling, shedding or sagging | Don't dust, brush or wet it; have a qualified inspector evaluate it. |
| Intact, with records showing no asbestos-containing material | Gentle dry dusting is reasonable; test a hidden spot first and keep any later spot-cleaning low-moisture. |
| Confirmed asbestos-containing material | Leave it undisturbed and use licensed abatement professionals for work that would disturb it. |
An intact ceiling with reliable material records is different from one that merely looks newer. For renters, landlords, and property managers, checking maintenance and renovation records is a useful first step. A freshly painted surface isn't proof that the texture underneath is safe to disturb.
Older rental properties and renovation projects deserve particular care because the person doing the cleaning may not know the material's history. Ordinary vacuuming isn't an appropriate way to investigate unexplained ceiling debris.
Safety gate: If the material is uncertain or shedding, keep children and pets away from the affected room and arrange an accredited asbestos inspection before dusting or wetting it.
That pause isn't overreacting. It gives you a clear answer before a cleaning tool changes the condition of the surface.
Cleaners and Tools to Use or Avoid
Most bottles in the cleaning aisle are made for washable hard surfaces, not fragile ceiling texture. A product that cuts through a greasy cooktop may be far too aggressive overhead. Tool softness, pressure, and moisture control matter more than cleaning strength.
For a cleared, sound ceiling, assemble a small kit: a HEPA vacuum with a natural-hair brush, a soft microfiber duster, white microfiber cloths, and a neutral, fragrance-free detergent. Add a drop cloth, eye protection, and a stable stepladder rather than improvising with a chair.
Ceiling cleaning tools and cleaners
| Tool or cleaner | Use it for | Avoid because |
|---|---|---|
| HEPA vacuum with a natural-hair brush | Loose dust and cobwebs with light blotting | Hard pressure or rubbing can pull texture off |
| Microfiber duster or soft brush | Light surface dust | Pressing into the peaks spreads dust and can shed texture |
| White microfiber cloth | Blotting marks | A dripping cloth or repeated scrubbing can damage the finish |
| Neutral, fragrance-free detergent, diluted | Light soil on sound texture | Strong cleaners or synthetic-fragrance formulas can leave unwanted residue |
| Bleach | Not recommended on ceilings | Harsh fumes and possible discoloration |
| Ammonia | Not recommended on ceilings | Harsh fumes and possible damage to finishes |
| Melamine sponge | Not recommended | Abrades the texture |
| Steam or pressure washer | Not recommended | Injects water into the texture |
| Scraper or sandpaper | Not recommended | Releases dust and potentially fibers from older material |
Read the label before opening the bottle
Fragrance-free means synthetic scents are left out entirely. It isn't the same as unscented. Don't use the absence of an obvious smell as your only ingredient check. Synthetic fragrance can mask other chemical odors; a perfumed room doesn't demonstrate that a surface is clean.
For parents and pet owners, the practical concern extends beyond the ceiling. Overspray and fallout can land on floors where babies crawl and pets nap. Apply cleaning solution to the cloth, not into the room, and keep the bottle closed when you aren't using it.
Bleach and ammonia don't belong in this kit. Their fumes are unwelcome in enclosed rooms, and neither offers a sensible trade-off for a finish that can discolor or deteriorate. The EPA's indoor-air-quality guidance for remodeling supports controlling dust and pollutant exposure rather than spreading them through occupied spaces.
If a cleaner's label calls for special ventilation precautions, I wouldn't choose it for this delicate overhead task. A mild label still doesn't replace a hidden-area test.
Keep nearby decorative fixtures separate from the ceiling-cleaning job, too. Crystal needs its own handling, as explained in our guide to cleaning a crystal chandelier, rather than a pass with the same dusty brush.
How to Dust and Vacuum a Textured Ceiling
This dry-first method is only for a structurally sound ceiling that has cleared the safety check. You're collecting loose dust, not polishing the finish. Use whichever gentle tool works without making repeated passes just for the sake of following a routine.
The basic sequence keeps preparation ahead of contact with the ceiling.
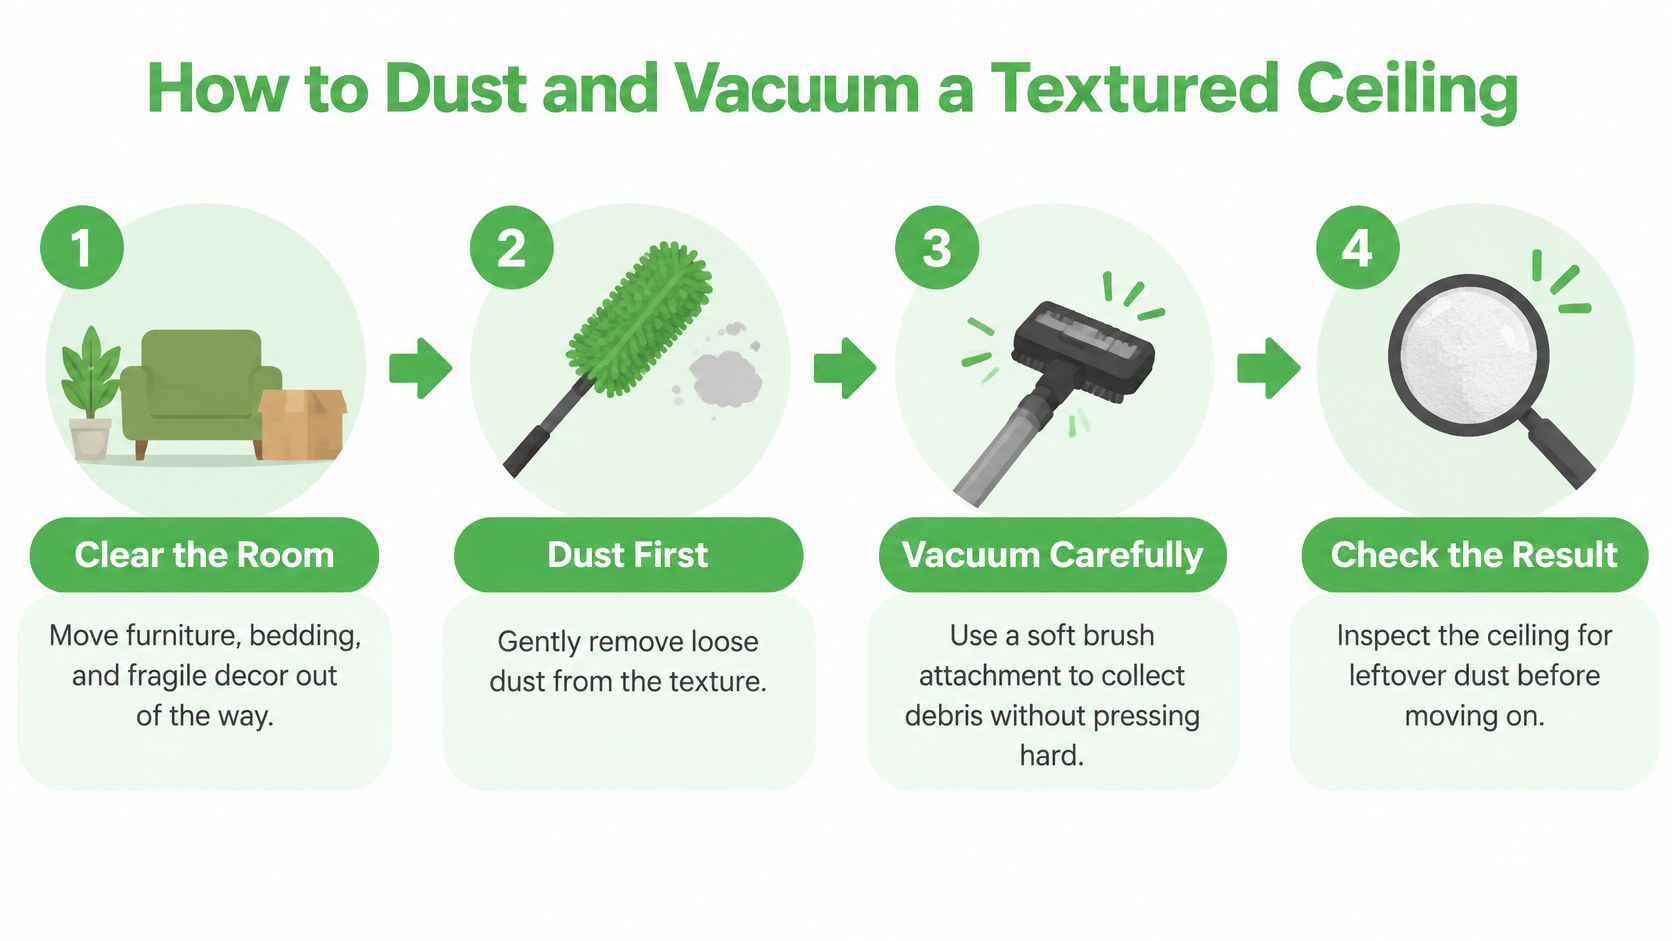
Prepare the room and work without pressure
Clear the work area. Move furniture, bedding, pet beds, and fragile decor away from the space below. Removing items is better than having to clean ceiling dust from upholstery afterward.
Protect what stays. Lay down a drop cloth and cover nearby light fixtures only after they're cool and their power is off. Switch off the ceiling fan so it won't scatter dust while you work.
Protect yourself and your footing. Wear eye protection and a properly fitted particulate respirator for ordinary dust, and use a stable stepladder on a level floor. Protective equipment doesn't make a suspect asbestos ceiling suitable for DIY cleaning.
Start at the perimeter. Work toward the center in overlapping passes, holding the soft vacuum brush just below the texture. Where contact is necessary, use a light blotting motion rather than dragging the bristles across the peaks.
Lift cobwebs away. Catch the web gently with the duster or brush instead of sweeping it along the ceiling. Dragging can smear the web and snag raised texture.
Refresh the tool as it loads. Clean or replace a dusty microfiber head before it starts redistributing soil. Stop immediately if you see ceiling particles falling, even if the surface looked sound beforehand.
Inspect before uncovering furniture. Shine a flashlight at an angle to find missed dust and check for newly loosened material. Collect fallout from the protected surfaces before removing the drop cloth.
Armstrong's ceiling-maintenance guidance specifies a HEPA-filtered commercial vacuum with 100 inches of water-lift capacity and a 3-inch-diameter natural-hair-bristle wand, emphasizing blotting and avoiding excessive pressure. That equipment specification isn't a reason to press a powerful household vacuum against popcorn texture; gentle contact remains essential.
Adapt to the dust, not the calendar
Long Texas air-conditioning seasons give Dallas households plenty of reason to check settled dust. Spring oak pollen, winter cedar pollen, and pet hair are also familiar concerns for sensitive households. Don't assume every gray shadow is dirt, though; angled light can make clean texture look uneven.
For another practical reference, Soca Services Painting describes gentle cleaning methods for popcorn ceilings. Keep the material's condition, rather than stain removal, as your limit.
After a remodel or in a new-construction Frisco home, ceiling dust may be part of a larger cleanup. Our post-construction cleaning checklist helps organize the surrounding work so you don't finish the floor before addressing overhead dust.
How to Spot-Clean Marks Without Soaking the Texture
Spot-cleaning is where restraint matters most. Keep moisture controlled, localized, and tested, even when the ceiling has been confirmed asbestos-free. A mark that won't lift gently is usually a reason to reassess, not to add more water.
A barely damp cloth lets you control where the liquid goes.
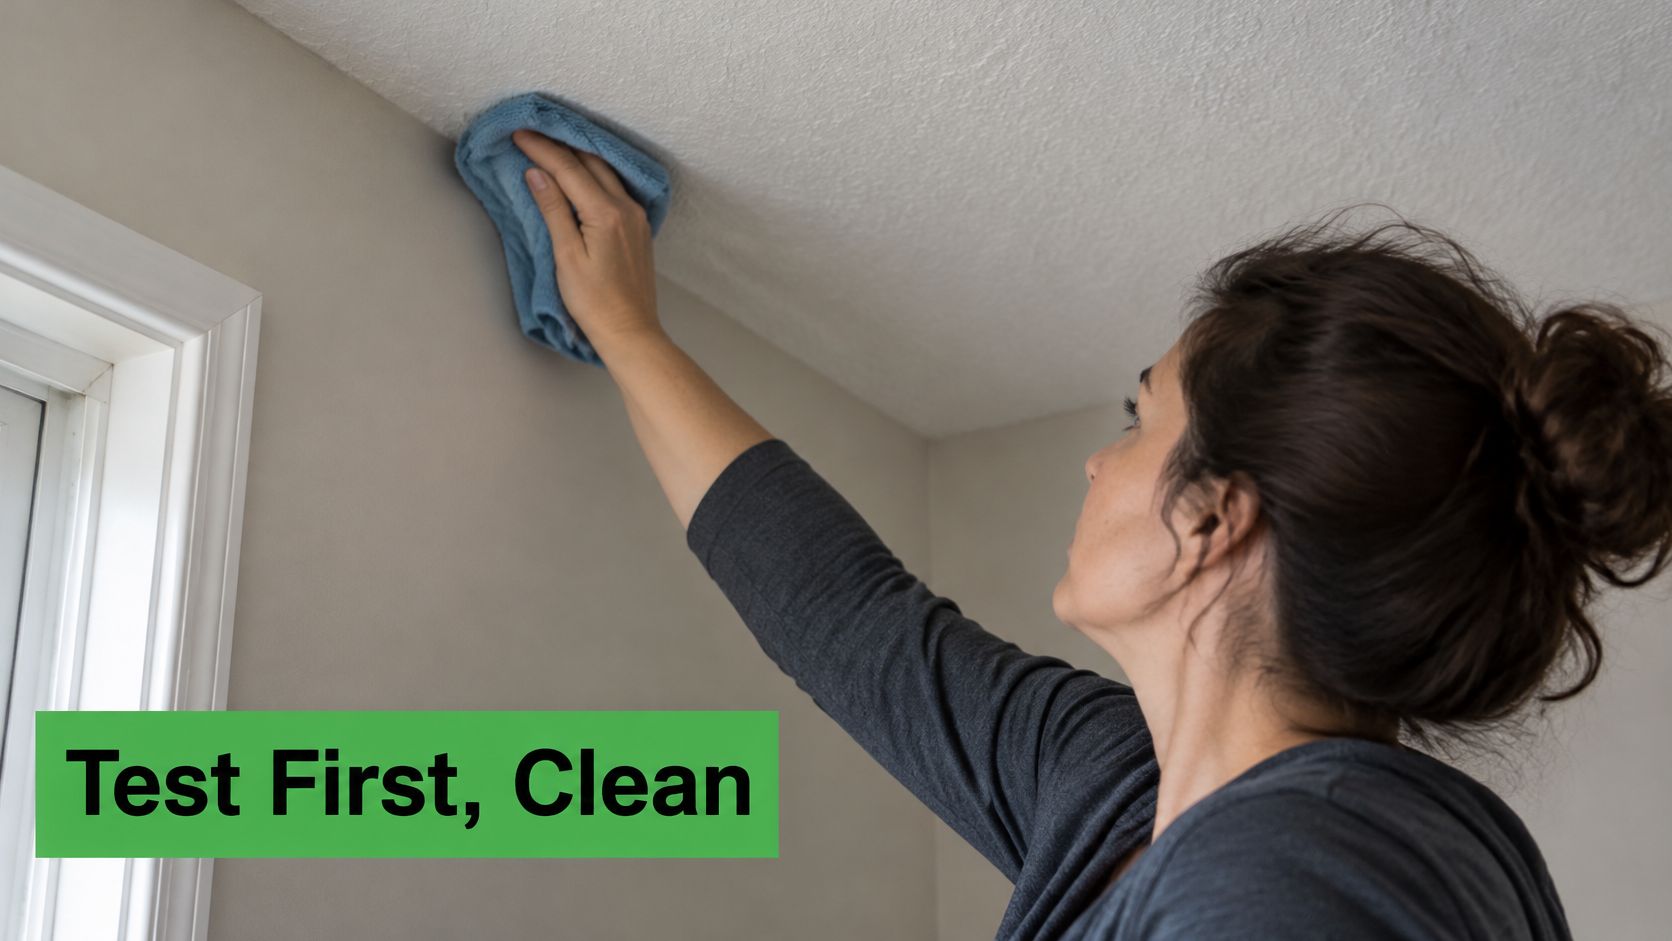
Test, blot and let it dry
Test a hidden corner first. Touch an inconspicuous spot with a barely damp white microfiber cloth. Let it dry and check for color transfer, missing texture, or a changed sheen before continuing.
Mix a small amount of neutral, fragrance-free detergent into warm water, using the product's light-cleaning dilution. Don't add vinegar, abrasive powder, or another cleaner to make it stronger.
Keep the work zone small. HGTV's popcorn-ceiling removal guide uses roughly 10-square-foot sections for removal preparation; treat that only as an organizational upper limit, not an area to soak for cleaning. For housekeeping, work on the individual mark and don't borrow removal instructions for misting or dwell time.
Wring out the cloth or soft sponge until it won't drip, then lightly dab the mark. Avoid sideways rubbing, which catches the raised bumps.
Rinse the cloth, not the ceiling. Use a fresh, barely damp part of the cloth to lift detergent residue, then gently blot with a dry cloth. Don't keep rewetting the same patch while chasing a shadow.
Let the area dry fully before judging it. Wet texture can look darker, and returning too soon can turn a modest cleaning attempt into a damaged patch.
Excess water can soften the coating, detach pieces, leave tide lines, or damage the paper face of the drywall. A spray bottle aimed overhead makes that moisture harder to control, especially around corners and fixtures.
Know what a successful result looks like
The right finish is a stable, intact surface with no texture loss, not necessarily a perfectly white ceiling. EPA guidance on asbestos concerns during home remodeling reinforces the importance of avoiding disturbance when building materials are uncertain.
A faint remaining mark is a better outcome than a clean-looking patch with the texture rubbed off.
Stop if a yellow ring spreads, the surface feels spongy, or particles transfer onto the cloth. Those aren't signs that you need more detergent. They're signs that the ceiling needs evaluation rather than another cleaning pass.
Water Stains, Musty Smells and Mold on Textured Ceilings
A yellow or brown ring on a textured ceiling is a moisture problem first, a cleaning problem second. Photograph the mark before you touch it, then check whether it is growing, damp to the touch, or paired with a musty smell. No cleaner can stop water coming from above.
Don't spray vinegar, bleach, or another liquid directly onto a stained ceiling as your first move. You add moisture without fixing the cause, and you can enlarge the damaged area.
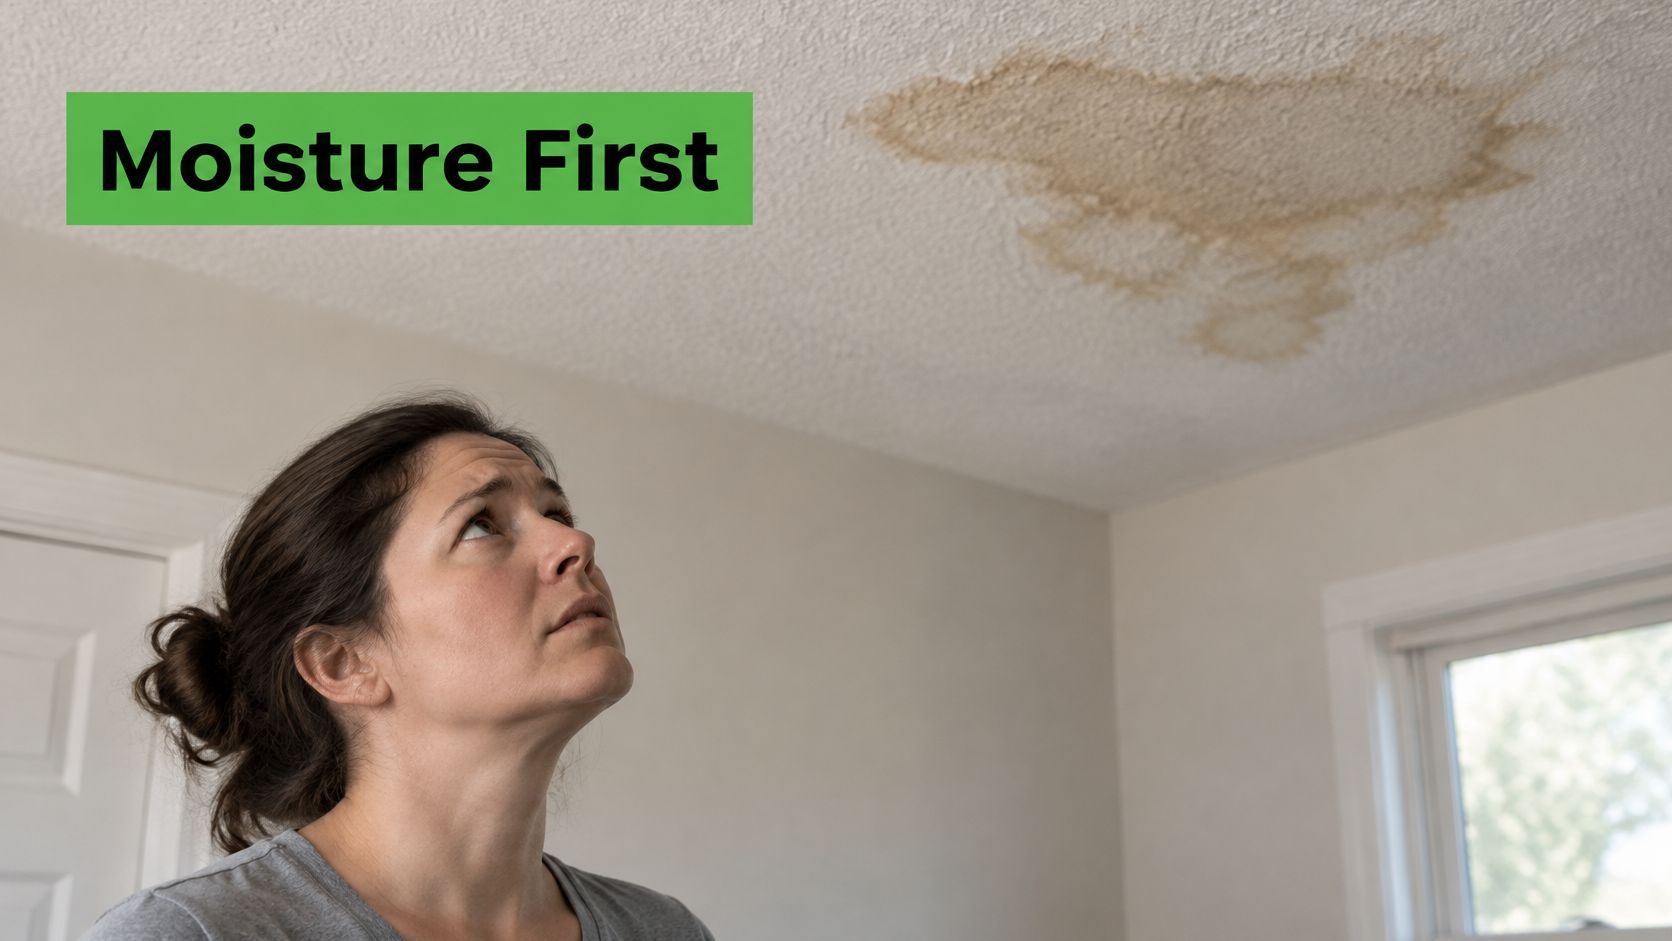
Use the symptom to choose the response
Treat the water source first. Dry damp materials promptly, and keep indoor humidity from remaining high. Porous ceiling material that cannot be cleaned and dried fully may need replacement rather than another washing attempt.
Moisture symptoms, likely causes and next steps
| Symptom | Likely cause | Next step |
|---|---|---|
| Small stain on a dry ceiling | Surface soil or dust, once moisture damage has been ruled out | Spot-clean with light blotting and let it dry |
| Yellow or brown ring | Moisture moving from a leak | Find and fix the source, dry fully, then reassess |
| Musty odor or visible mold | Trapped moisture or excessive humidity | Correct the moisture source and dry the area fully; get professional help for extensive growth |
| Soft, sagging or crumbling texture | Water saturation or deterioration | Stop all wet cleaning and get a professional evaluation |
Humidity readings help you judge room conditions, but they do not diagnose the ceiling by themselves. Mold can follow a localized leak even when the room feels dry. An old stain may be harmless, but confirm the source has been corrected before you treat it as cosmetic.
Separate a cosmetic mark from damaged material
Painted texture may handle a little surface moisture differently from unpainted acoustic texture. Neither is waterproof. If water has reached the drywall or loosened the coating, scrubbing the visible surface won't restore its strength.
Roof, plumbing, and HVAC leaks are all possible sources, including in multi-unit housing where the source may be outside your own room. Erica's Plumbing, Air Conditioning & Restoration explains additional signs of water-damaged drywall that can help you recognize when the problem extends beneath the finish.
Our guide to getting rid of mildew in a shower addresses a different surface. Don't transfer a tile-cleaning method to porous ceiling material.
Keep people away from a sagging area and arrange professional assessment. I'd treat any soft or sagging patch as a stop sign. Cleaning is appropriate only after the ceiling is dry, the moisture source is corrected, and the material is sound.
Decide When to Call a Pro for Your Ceiling
The right professional depends on what you're looking at. A dusty, cleared ceiling is a housekeeping task. An untested older finish, an active leak, or failing texture needs a different kind of expertise.
DIY is reasonable when you can reach the area safely and the job involves light dust or a small surface mark. Hand it over when access requires awkward ladder work, the finish reacts unpredictably, or you're tempted to scrub harder.
That last instinct is the useful signal. If more pressure feels like the only option left, the ceiling is telling you it's the wrong tool for the job.
Choose the right kind of help
- For uncertain material, choose assessment first. An accredited asbestos inspector should evaluate suspect texture before anyone cleans or repairs it. A cleaning appointment isn't a substitute for material identification.
- For active moisture damage, choose repair and restoration. Leaks, mold, softness, and sagging need the cause addressed before cosmetic work begins.
- For ordinary household buildup, choose a cleaning plan. Gmaids recommends Deep Cleaning for first-time cleanings, seasonal resets, and homes that haven't been professionally cleaned recently. The work uses non-toxic, fragrance-free products with no bleach and no ammonia. Children should stay in other rooms while the team is working, since the equipment and products may not be safe for them.
If repair work is necessary, verify credentials relevant to the job and your location. The Excellent Home Improvement contractor hiring guide offers useful contractor-screening questions, although its licensing context is New York, not Texas.
Set clear expectations before work starts
Gmaids serves Dallas and surrounding cities. Cleaning is performed by Certified Cleaning Teams®, and plans are built around each home's needs. Tell the team about ceiling height, material records, loose texture, and stains before hands-on work is considered. Those four details often decide whether a cleaning visit is appropriate at all.
Gmaids has offered non-toxic, fragrance-free house cleaning since 2004. That standard also means recognizing when a surface needs specialist attention rather than another cleaning product.
Gmaids provides non-toxic, fragrance-free house cleaning to help manage household dust without bleach, ammonia, or synthetic fragrance, with ceiling work guided by material safety and condition. Request a quote at Gmaids, or call 214-997-6918 and describe your textured ceiling so the team can discuss the right cleaning plan.


Ready for a healthier, cleaner home?